


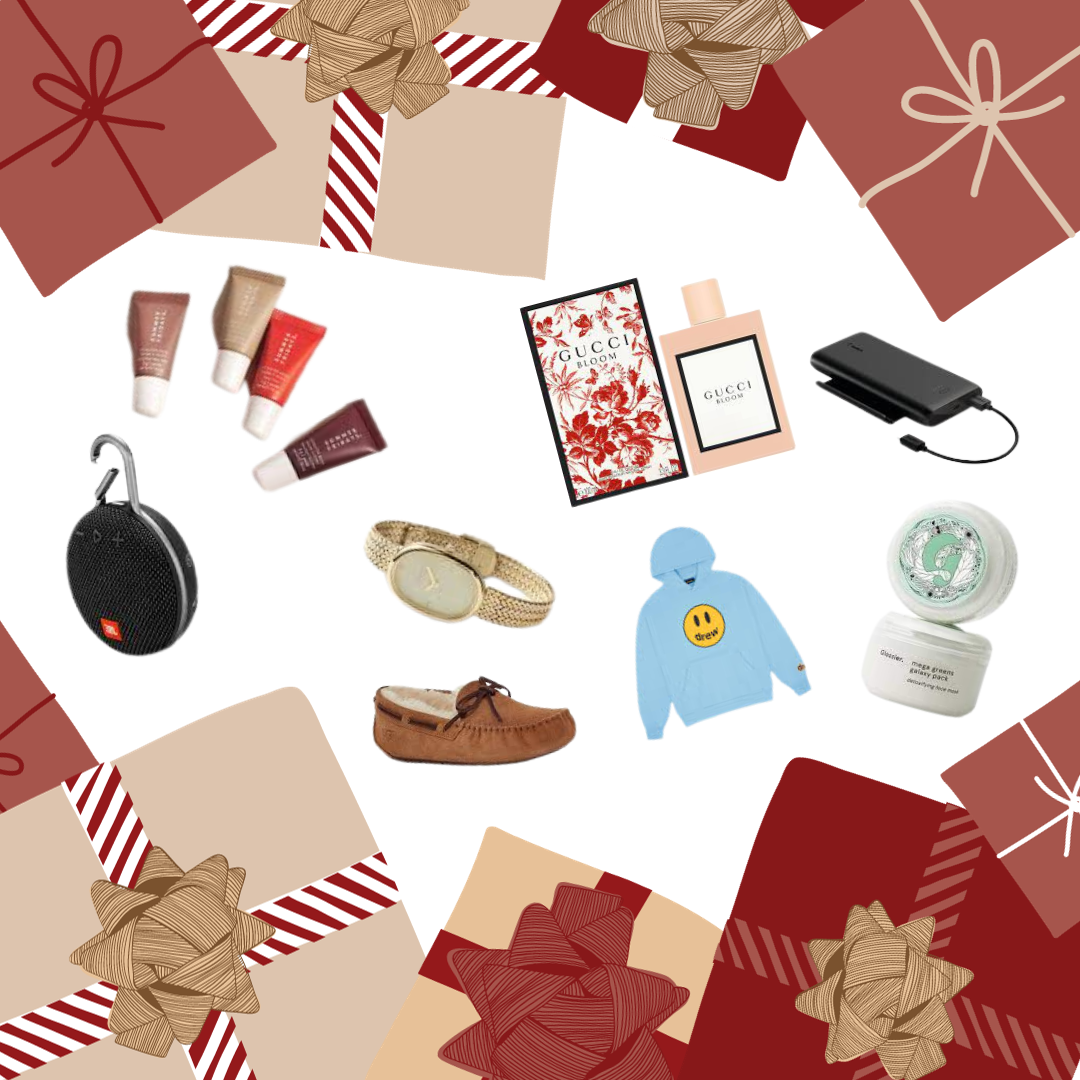


Fall Recipe: Cinnamon Buns
Learn how to make this fall time favorite from scratch with this easy recipe! No really—this fall fave is super simple! Easy as pie? Nah. Easy as cinnamon buns.
Fall has got to be one of my favorite seasons. Sweater weather returns, the changing color of the leaves are beautiful, it’s the season of apple and pumpkin picking, and comes with some pretty great holidays. On top of all of this, fall time recipes in general are amazing, and so in honor of the start of fall, I thought I’d write a bit about and explain how to make one of my favorite reminds-me-of-fall recipes: cinnamon buns.
I really love this recipe because it’s surprisingly super easy to make and is perfect for a chill fall weekend, perhaps while playing some TV or music in the background or catching up on some reading during the cinnamon buns’ rise and baking time.
Before we get started, some supplies that you’ll need for this include two large mixing bowls (if one of these could be a bowl that attaches to a stand mixer, that’d be ideal, but if you don’t have a stand mixer, no worries, you can still definitely do this recipe). You’ll also be using a whisk, measuring cups/spoons, a microwave/stovetop, a clean surface to roll out/knead dough, a 10-in cake pan/pie pan, plastic wrap/aluminum foil, and an oven.
INGREDIENTS:
For the Rolls
2 and ¾ cups all purpose flour
¼ cup granulated sugar
2 and ¼ teaspoons yeast (I used Fleischmann’s Active Dry Yeast, but I’ve heard Red Star
Platinum Yeast is also very good)
3 tablespoons butter, unsalted
½ teaspoon salt
½ cup whole milk
¼ cup water
1 egg
For the Filling
3 tablespoons unsalted butter
1 tablespoon ground cinnamon
¼ cup light brown sugar
For the Icing
1 cup powdered sugar
½ teaspoon of pure vanilla extract
2-3 tablespoons of milk (use your judgement for the amount you put in based on what consistency
icing you think is right; you can also substitute in strong brewed coffee in place of the milk for a
bolder flavor)
Note before we get started: Baking, in my opinion, is both an artform and a science. While there are certain proportions that need to be upheld so that what you’re baking tastes good, don’t be shy to trust your gut every now and then. The more you bake, the more you have a sense for what things should look like, and so if something doesn’t look how you want it, think about what ingredients you need to add more of for it to be better. Let yourself be creative, and who cares if things don’t turn out exactly how you envisioned the first time around! Practice makes perfect, and as long as you’re enjoying yourself, mission accomplished.
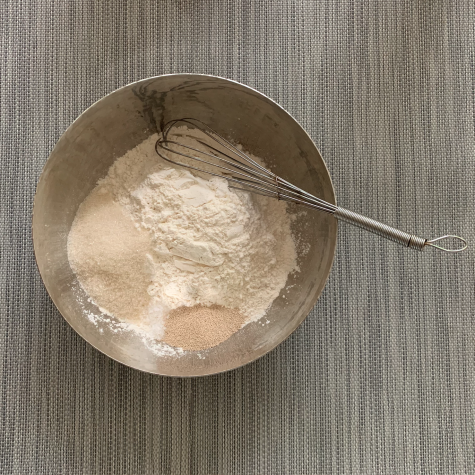
1. Making the dough: In a large bowl, whisk together the flour, sugar, yeast, and salt.
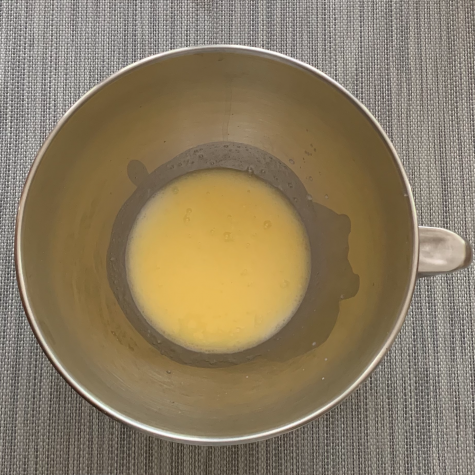
2. Use a microwave (or stove) to melt the 3 tablespoons of butter. Mix together this melted butter with the salt, whole milk, and water, using a stand mixer if possible.
Tip: If you have a stand mixer, this is a great opportunity to use it. It’ll make your life a bit easier in the near future, but of course if you don’t have one, no worries, it’s definitely not necessary.
3. Combine the dry mixture from step one with the wet mixture from step two in the stand mixer (or whisk/mix together by hand.
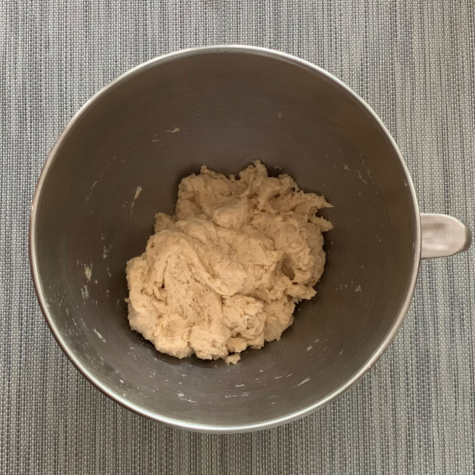
4. Using lightly floured hands and working on a floured work surface, knead the dough for 3 minutes.
Tip: Make sure to make like Colette from Ratatouille and always “keep your station clean.” Not only because in this step above you are actually working on the counter, but also because a clear counter to work on equals a clear headspace.
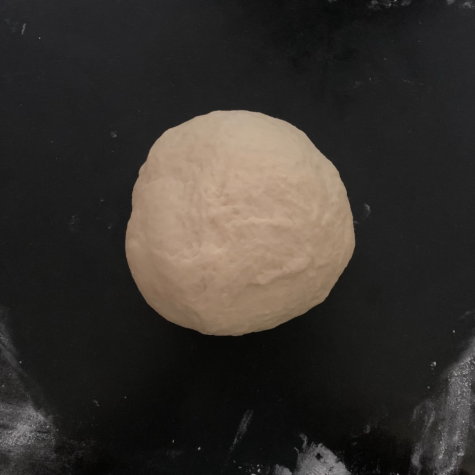
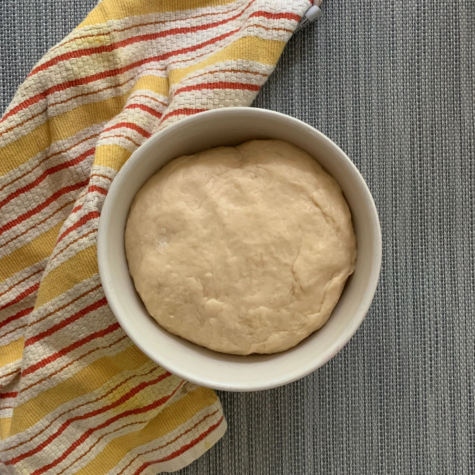
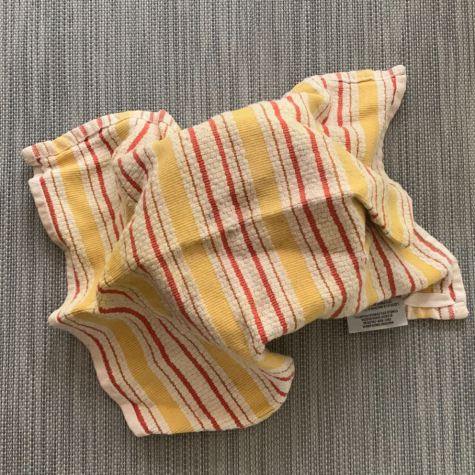
5. Place the dough ball into a greased bowl and cover loosely with a kitchen towel. Let the dough sit under the towel for about 10 minutes.
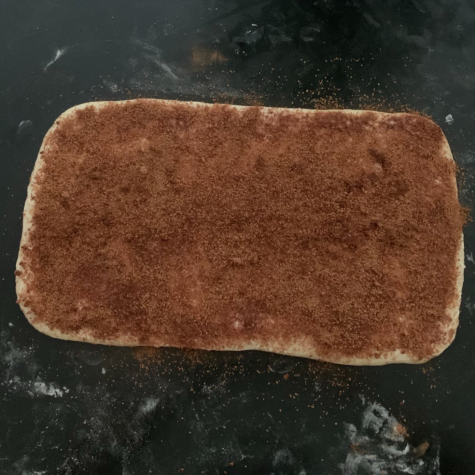
6. Filling the Rolls: After10 minutes, roll out the dough into a 14 by 8 inch rectangle. You might find that you need a bit of flour on the counter in some cases, but try not to use too much. Now, soften (but not melt!) 3 tablespoons of unsalted butter and spread it on top of your rectangular-shaped dough. Then, mix together the cinnamon and brown sugar and evenly sprinkle it on top.
Tip: If you’re trying to soften butter using a microwave, I recommend first cutting it into smaller cubes to increase its surface area, allowing it to soften quicker. You should also aim to put it in for only 5-10 seconds at a time when just trying to soften it, so that you don’t accidentally fully melt it.
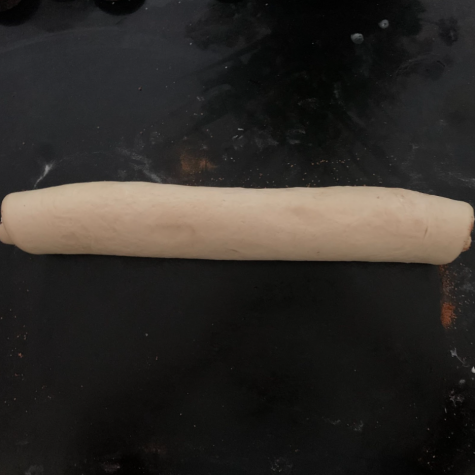
7. Roll up the dough as tightly as you can manage to form a 14-inch log.
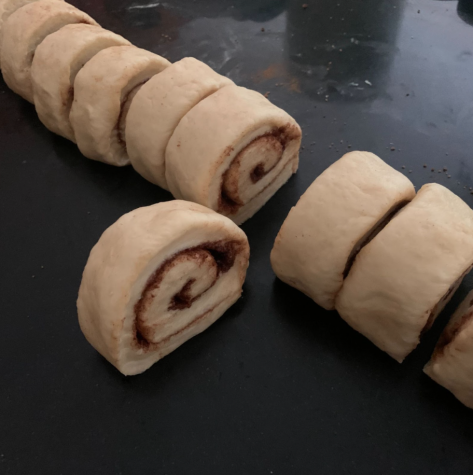
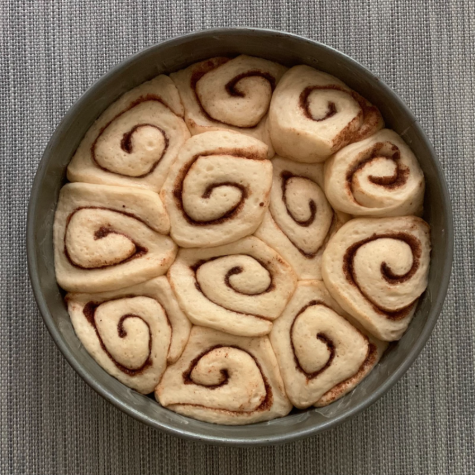
8. Cut this log into 10-12 even rolls.

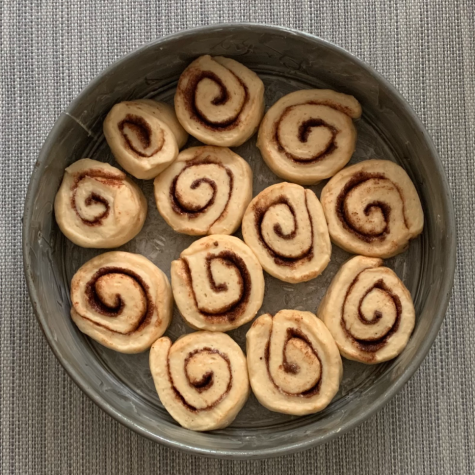
9. Arrange rolls into a greased 10-inch cake/pie pan.
Tips: Make sure to properly grease your pan! It’s the worst feeling in the world when something you’ve baked looks amazing in the pan, but then the moment you try and take it out it all breaks. Also, if you happen to have a springform cake pan (where the sides come off, but the base stays below), I’ve found that it’s great for this recipe.
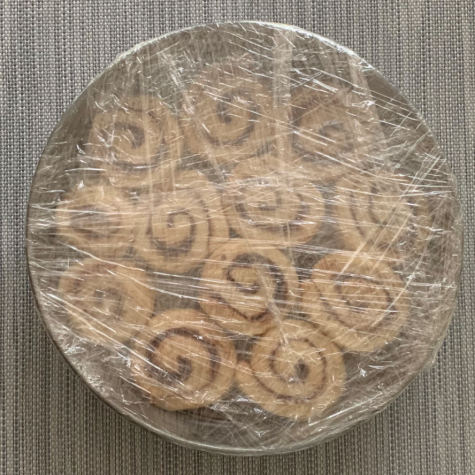
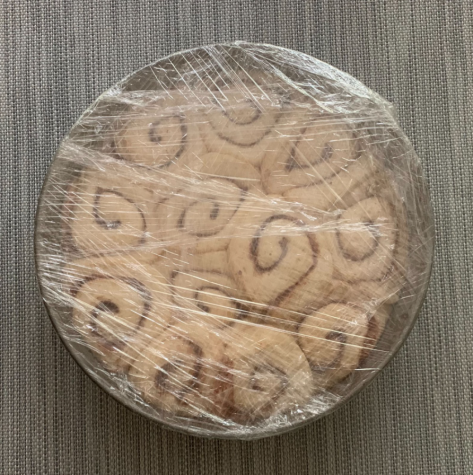
10. Rising: Tightly cover the pan that the rolls are in with either plastic or aluminum wrap. Let your rolls rise in a warm, draft-free environment for 60-90 minutes.
Tips: I prefer plastic wrap because you can check up on your rolls to see how they’re rising. Also, if you’re on a bit of a time crunch and you know how long it takes to preheat your oven, preheat it sometime during the rise, because the next step is baking.
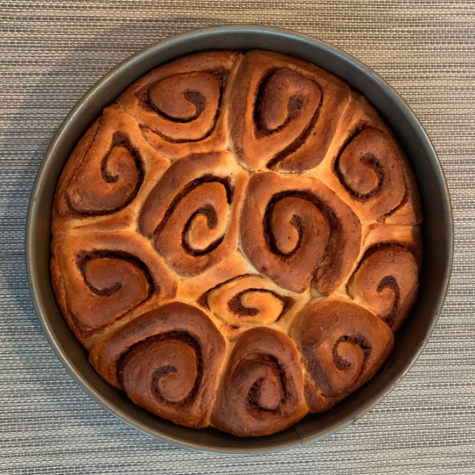
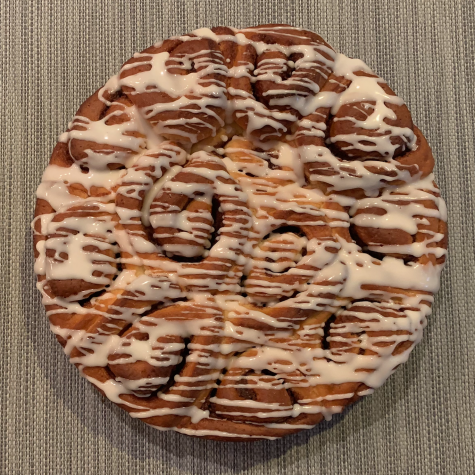
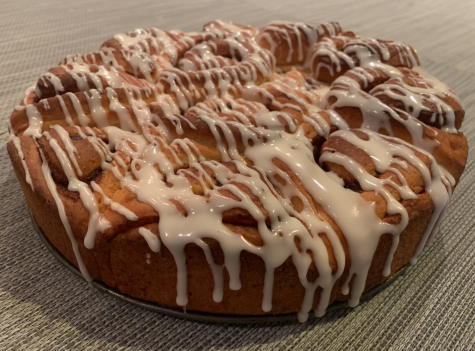
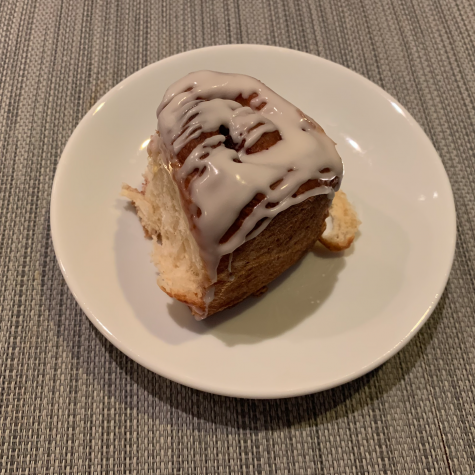
11. Baking the Rolls: Take off the plastic wrap and bake the rolls for 25-28 minutes in a preheated 375 F oven until you see a golden brown. If the tops of your cinnamon buns are quickly getting too brown, loosely cover with aluminum foil and continue baking. Once you take them out of the oven, let them cool completely before you put on the icing.
Tip: when cooling, if you’re using a springform cake pan, you can take off the sides after 5-10 minutes.
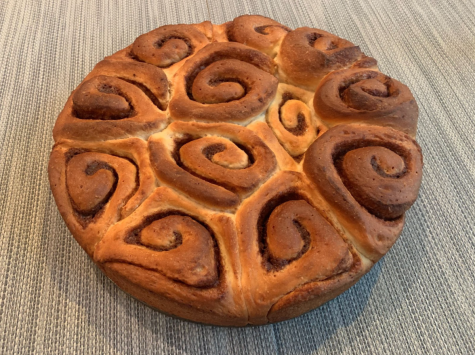
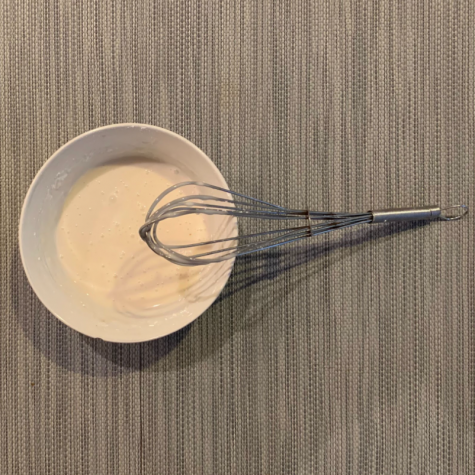
12. Making the Icing: Whisk together powdered sugar, vanilla extract, and milk/coffee. Drizzle icing over the rolls (get artsy here, if you like!). And then, enjoy and share your cinnamon buns! Happy Fall!

When not writing or editing for GAP, Sara loves to bake with Chef's Table, the Great British Baking Show, or music playing in the background. She also...